Setting Up a Home Studio

Music recording and production are not as difficult as they may seem. It is possible to get a great-sounding recording in your home studio using only the equipment you already have. And, you don’t have to be a professional musician to do so. This article will give you step-by-step instructions on how to set up a home recording studio.

Setting Up a Studio at Home

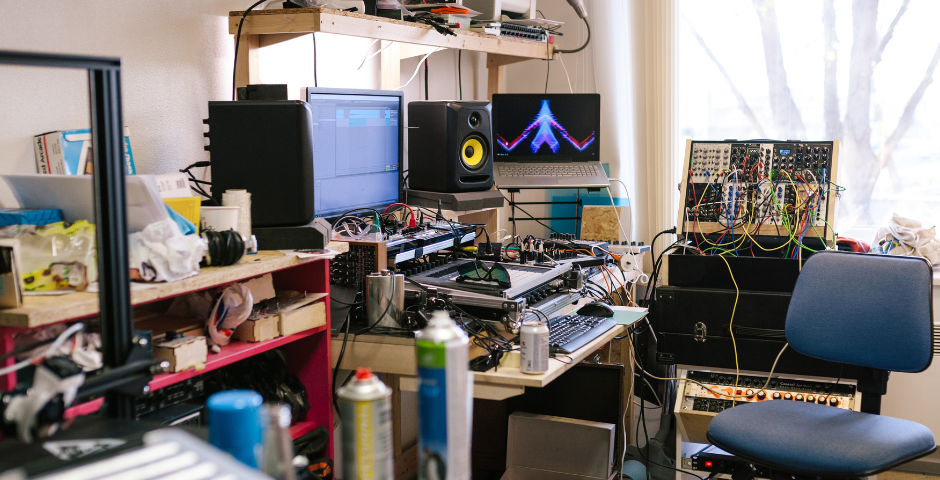
A recording studio is the heart of the music industry. If a song sounds great but does not have the proper recording, it will never enter the charts and might never see the light of day. Many musicians and music professionals have started to use home recording studios to record their songs. The availability of prefab sheds for sale has made it easy for early musicians to set up their studios in their backyards. As a result, a home recording studio is not just a place to record music but also a place to practice and develop skills in music production.

If you’re an aspiring musician or music producer, you may have considered setting up a home studio in order to record your Music. Maybe you’ve been inspired by a particular artist or had an idea for a song you’ve been wanting to record. Or perhaps you want to be able to create music whenever you want to, without having to worry about going to a professional studio. Whatever the reason, setting up a home studio is a great idea, and here’s how to get started!

But before you make a move, it might be important to make sure your house does not have a rat population. You don’t want rats cutting your electrical wires which could cause damage to your equipment. If you do have such issues, you can contact a local pest control service ( look up https://www.pestcontrolexperts.com/local/idaho/ in case you require pest removal) that can eliminate pests like rats from your home. Having said that, let’s get started with setting up a studio at home.

Don’t Forget this Studio Equipment.

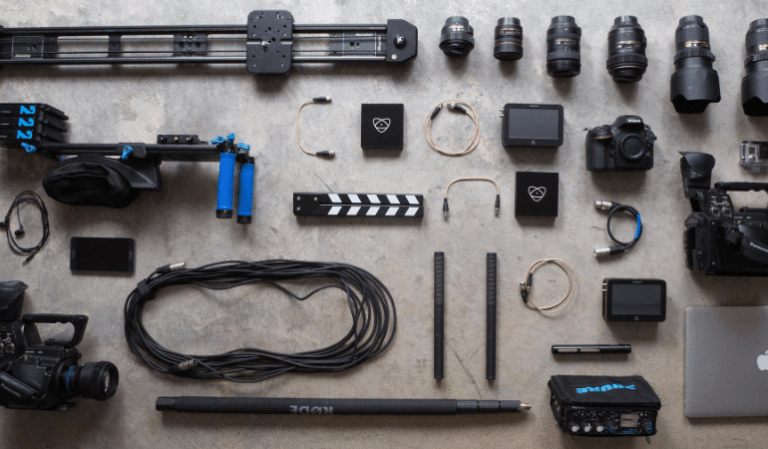
Here is the following equipment that your home studio should have:

• Studio monitors – Every musician needs a good set of monitors. It is not the same thing as a pair of headphones, which are for listening to music. A monitor is a tool for tracking the sound of your music and for mixing it with other instruments. It’s time to get the “real talk” on studio monitors. Unfortunately, it’s not an easy conversation to have. The “one size fits all” ideal of the high-end studio monitor that every musician should own is just plain wrong. Instead, you should have a range of monitors to cover every possible situation you might encounter as a producer or recording engineer. In order to get the most out of your studio, you need to be familiar with how to set up your studio monitors.

• MIDI keyboard – is the hardware that you need to set up your home studio. It includes one or more instruments and often controls the performance of other instruments in the setup. It also enables you to use software synthesizers and effects in real-time. When you are recording and mixing your music, a keyboard is the only thing that will be needed to do. This is because keyboards have more inputs as compared to controllers. All you have to do is make sure that you can record your tracks with your computer.

• Audio interface – A simple but essential piece of equipment you need to set up in your home studio. This is because audio interfaces are computer peripheral devices that allow you to connect your microphone to your computer.

• Digital Audio Workstation (DAW) – is an industry term for software programs that provide a means of recording, editing, mixing, and printing audio in a studio. It enables you to record, mix and master your own recordings is a sure-fire way to become the independent artist you have always dreamed of becoming. Beginners seeking to start their careers as music producers, songwriters, singers, or musicians should consider setting up a home studio.

• Computer – while a PC or Mac will get you up and running quickly, these machines will only allow you to produce the low-level sounds that will form the foundation of your recordings. Professional-grade audio recording software like Pro Tools and Logic is far more powerful. It includes features like studio effects, virtual instruments, and automation that will help you create some truly awesome music.

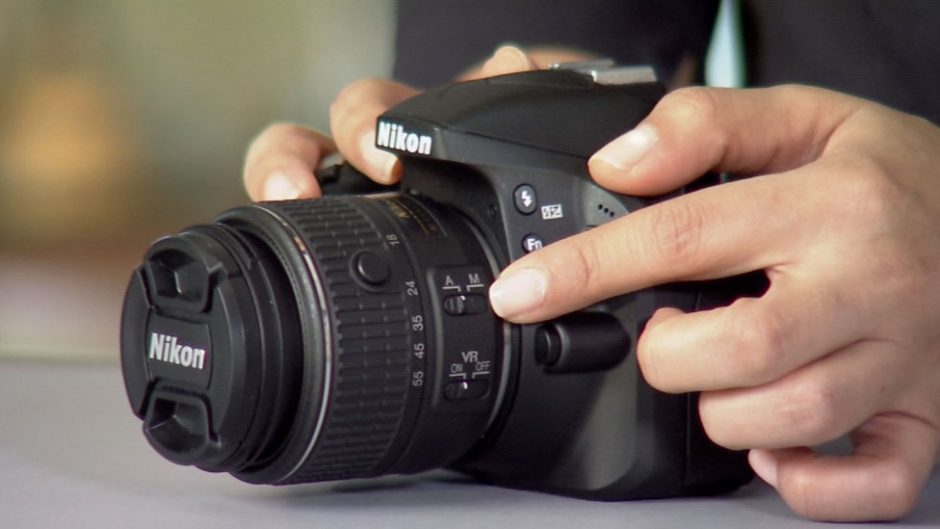
• Microphone – if you want your audio to sound professional, you need to invest in a good microphone. But, if you’re like most people, you’re probably stuck between a desire to cut some corners and the desire to create high-quality recordings.

• Headphones – are a must-have for any studio and perhaps the most important piece of equipment. Whether you’re recording music, watching videos, or editing audio, your headphones will be what you rely on to get the job done.

Setting up a home recording studio is a great way to get into the music industry, but it can be a little daunting if you’re not a savvy gearhead. If you want to sound like a pro, you’ll need to get yourself some proper recording equipment. With a little knowledge and a few killer plugins, you can even create professional-quality music without breaking the bank.

Using Natural Light to Enhance Your Photos

Natural lighting is the most intense form of light. Many photographers try to get as much sunlight as possible for their photos but don’t always realize that the quality of the light they get can be just as important. The sun is a source of natural light, but it’s not omniscient. It will not always be your best friend, especially if you’re photographing something in a place that doesn’t provide natural light.

The term “natural light” is used to describe the light that bounces around outdoors. It’s commonly called daylight” or “sunlight,” and it’s perceived by humans as white. While the sun may be white, it doesn’t mean that the daylight is. Daylight is a broad term describing the various colors and intensity of sunlight, which may vary depending on how far away the sun is, how clear the air is, and the angle of the sun. This means that for indoor photography, you can’t rely on natural light alone.

Do natural light photos look bad? Or do you just have a bad light? If the latter is true, then you are definitely in the minority. It is estimated that as many as 80% of our photos are taken with artificial lights. It may seem obvious, but even experts have a hard time judging the quality of natural light for an image. This is mainly due to the fact that the quality of light varies greatly from one location to another, as well as the time of the day.

How does Natural Light Enhance Your Photos?

Light can be your biggest ally or your biggest enemy. It can make a great picture or a great shot that can be ruined by a poor choice of light. Using the right tool and the right approach can help you achieve the kind of light that empowers you while limiting the kind of light that takes your picture down a notch.

Very satisfying for skin tones

Photographers are always looking for ways to help their subjects look their best. This is especially true when it comes to portraits. Skin tones favor a warmer or cooler color, depending on the person. This is one of the reasons that warm-looking reds and oranges are popular with portraits. The best way to ensure your skin tones look their best is to shoot in natural light. Whether you have the right hats, camera bags, or even color filters, natural light is the easiest way to ensure your subjects will look their best.

Quick and easy to set up

Light is the most difficult element to control in photography since it is almost impossible to control at all. You are limited to the length of your shutter speed, and sometimes, you can change the direction it comes from. While there are a lot of tools available to aid you in controlling your light, there is one tool that many people never put on their list. That tool is a reflector. This is a light that bounces off of a different surface and helps you control the light you are using for your photos.

Allows photography in a natural way

Most of us take great pleasure in gazing at our favorite images captured in the outdoors, and in those moments where the light is perfect, the shutter clicks, and the image is captured, we take it all in. But what if there was a way to capture those perfect moments without the need to head outdoors, or without the need for a flash, studio lights, or a trip to Photoshop? Well, there is, thanks to the use of a wide range of lighting fixtures and accessories, called LED (light-emitting diode) lighting. It can seem simple enough to just stand in front of a window and point a camera at it, but it’s not always so easy to get the shot without looking like a tourist, or worse, a spy.

There are many advantages to using natural light when taking photos, and there are many ways to get the most from your photography session. The biggest advantage is the real life and dynamic feeling you get when you take photos outside in natural light. There is less of an opportunity to convey this feeling with a camera, as it is difficult to achieve, but natural light can be achieved simply with the use of a photo backpack and a camera with a lens.

How to Discover Which Colors Suit You

The easiest way to design your wardrobe is to go with a color scheme that you feel is your style. Whether that be for a photo shoot or for everyday wear, the principle is the same. For example, if you have a set of clothes in a certain color, it may be a sign that they were a favorite of a previous owner. Or it may be a color that you feel looks good on you, even if it’s not your favorite. Some people prefer dark colors while others can’t get enough bright colors. Everyone is different, and we all have different tastes when it comes to picking our favorite colors. Choosing the correct ones will help you look and feel your best.

There are many ways to be stylish and many ways to look for style. Some of us prefer to look inside our wardrobe for inspiration; others like to look at celebrities or stylists for inspiration. We all like to choose our clothes to fit our personality, but some color choices can be harder than others to keep up with. This then causes some people to end up spending a considerable amount on the clothes and accessories they purchase. If you feel as though you spend a little too much on clothing items, then looking for discounts and coupons, whether that be in store or using online sites like this one (view it now) could be a tremendous way to start saving on your clothes shops. Continuing with the impact of color, you may have noticed that our faces look different depending on the colors of the clothes and accessories we wear. The countless chemicals in our environment alter our facial appearance, and this is what makes some colors look good and others not so good.

In this article, we’ll be helping you know how you can determine your undertone, and we’ll also be discussing the different types of undertones.

  1. Skin tone is very important when it comes to picking the right shades. It all depends on what you are looking for. If you are looking for a darker tone, then go for darker shades. If you are looking for a lighter tone, then go for lighter shades. You can check this out with the help of your veins.

The veins in your body appear when blood reaches the surface of the skin. These veins are visible in the neck, below the neck, in the wrists, in the ankles, in the groin, in the armpits, in the neck, and the face. The color of your veins will tell you what colors you are most suited for. Using this information, you may find you are most attracted to black or perhaps be drawn to light colors.

  1. Various types of jewelry are available in the market that goes by the same name as they are all made of the same material. You might have a personal preference to buy collections from Tiffany, Gucci, and similar exquisite stores. However, if you don’t have enough budget to buy from those stores, you can check out reliable ones like Macys and Target where you can buy affordable jewelry (see macys promo codes here, if interested). A lot of us wonder what undertones we have, and that is where our true beauty lies. Jewelry has so many different types, so this is a good way to see what makes your skin look better. Remember, the types of stones that complement our skin tone are rare. For example, yellow sapphires are good for fair skin tones, blues are good for medium skin tones, and reds are good for dark skin tones.
  2. The sun’s reaction to your skin is a great indicator of your undertone. The sun’s rays deeply penetrate the inner layer of our skin, the dermis, where they start this process. This layer determines the resulting color of your skin. A pale complexion results from a lack of melanin, resulting from a sun-induced depletion of melanin.

Different Types Of Undertones:

The skin undertone is the shade of your skin. The tone of your skin determines how light or dark your skin tone is. Skin undertone also determines how rich or pale your skin tone is. When we’re born with a very distinct color to our skin, this color is what we’ll refer to as our skin undertone and is the first and most prominent color to appear on our skin.

  1. The cool undertone is generally considered to be a light, peach-like tone. If you have this undertone, you will rock jewel tones, different shades of the sea, cool grays, and certain shades of white.
  2. Now, if you have the opposite undertone from the cool undertone, you’ll look beautiful with earthly tones, off-white colors, taupe, and that color’s orange and yellow.
  3. There is also an undertone that we all call the neutral undertone. If you have this undertone, you don’t need to be careful with colors since it is perfect for various hues but do be careful when it comes to bright colors.

Street Photography: What to Know

Street photography is trendy these days. It is a subject that everyone has been talking about for years. However, only a few of us have ever “really” done it. The reason is that we have not known how to approach it. However, when we are aware of the principles the techniques, and we have a lot of experience, the subject opens up many opportunities.

What is Street Photography

Like with any other form of art, the most important thing for a street photographer is to tell a story with a photograph. Capturing a moment is the first step to creating a truly great photograph; but this is not always enough. (Although this is the first step for up-and-coming photographers, so we’ll let them off the hook for now). The next step on the ladder to becoming a successful street photographer is to develop a unique style. Some of these styles are more time-consuming to develop than others, but the result is always worth the effort.

Street photography is all about capturing life at the moment, the unexpected, and producing emotional, evocative, and authentic images. It is not about snapping a photo of your friends, family, or dog, which many people think it is about.

What is a Good Street Photograph?

I’ll bet you have a favorite photo that you took in a street setting. Maybe it’s the first time you took photos in a park or captured a scene in a public space, or you’ve been taking photos of the same subjects in different settings, such as the same building, the same street corner, or the same office complex. What makes that photo “good”? What does it say about what you do, or where you live, or what you’re interested in? It’s fun to go out and shoot new things, but what makes a good street photography image?

A strong composition, a well-lit subject, and a well-lit background are important to creating a successful image. But there are other elements to street photography, like the subject’s expression, emotion, and presentation.

Does Street Photography Need People?

Street photography does not require people, nor does it necessarily require street. The right kind of street photography can be made anywhere. Street photography is a style of photography that takes place in the real world and is easily accessible to anyone with a camera. But what does it mean when you take pictures of people? After all, do the people in the pictures need to be there for a photo to be taken?

What Camera Equipment for Street Photography

Street photography is a fun and easy way to capture spontaneous moments in life. It’s a great way to capture moments that are often fleeting, like meeting a friend who you rarely get to see or catching a great photo of something that catches your eye. You can add drama to a scene by using interesting props, or you can simply shoot a scene using your camera’s built in lens. It’s a great way to make unique photos full of emotions, so capturing moments in life that are full of emotions should be the goal for a street photographer.

What Is The Secret Of Great Street Photography?

Street photography is one of the most popular hobbies among photographers today. It has a rich history and continues to be a major part of the digital photography market. There is a wide array of camera equipment and techniques to help you create great images from the streets. When it comes to street photography, the best way to start is by explaining what it actually means to be on the street. Street photography is a genre of photography in which the photographer captures an image of a person or group of people on the street and the act of photographing is continuous, and the composition often occurs without a pre-determined series of shots.

Street photography is a genre that is defined by its difference. It is not about grand technical skills. Instead, it is about the ability to find the most creative and creative moments in the street. Street photography is one of the most exciting categories of photography to be a part of. Although it is not as ubiquitous as landscape, documentary, or portrait photography, street photography, like its more established counterparts, can make for a fascinating life-long journey. Like all photography, street photography is best when it is simple, direct, and shareable.

How To Use Flash Photography Properly

Flash photography can be a powerful tool for capturing images, but you could end up with some pretty bad pictures if you don’t know how to use it properly. The ability to use flash photography is a great asset in a professional setting, but it’s not always the best choice when shooting the photos that define your business. You can use flash photography to get a great shot, but you can also get a great shot using a combination of natural light, off-camera flashes, and fill flash. The key to getting the best out of your flash photography is to understand the technical side to not miss out on the artistic possibilities.

What Is Flash Photography?

For those of you who have no idea what a flash is, it’s a little box that you can attach to your camera, which emits light that can be used to make a picture better. It can be very effective at night, so you don’t have to worry about taking a picture in dark places or making you look like a person that is about to be blown up by the aliens.

Flash photography is an art that involves using flash photography to create pictures by using the natural light in the room. It is a technique used by photographers to take pictures of their subjects with a camera flash. It can also be called “flash-photo,” “flash-art,” “speed flash photography,” “speed light photography,” or “forced flash photography.”

Flash photography is one of the most exciting and innovative developments in photography. It allows the photographer to create a bright light that can light up a subject well and underexpose the rest of the picture. This is great for photographing a subject that is too dark, or the light is not enough to properly expose it. This also makes the photo brighter and more colorful.

With all the digital cameras and smartphones available, there are a lot of similarities between them, but there are also some differences, especially when it comes to photography. For example, you can’t use a smartphone to take a high-quality picture. With mobile devices, you will see poor quality. Furthermore, the quality of a digital camera is also a factor that determines how good the picture will be.

Bounce the Light

There are a number of different ways to shoot a photo. Some people like to shoot vertically, others horizontally, or even sometimes doing a combination of both. However, one of the most popular forms of photography used these days is the use of flash photography. For some people, the flash is a nuisance, causing the camera to overheat, and for others, the flash is a necessity, which is why this post is dedicated to explaining to you, the reader, how to use your flash properly.

Use Colored Flash Gels

The gels are very simple to use and are a lot of fun. You simply place the gel on your lens and shoot, then remove the gel and use that image in post-processing. This is a great way to create some cool effects with your photography. You can use it to create effects such as light trails and abstract art.

Diffuse Your Flash

There are a lot of photographers out there who never bother to learn how to use flash photography properly. This is a shame, as it does make a difference to the quality of your photos. In this post, we will teach you how to use the flash and light it properly. It’s easy to get caught up in the glitz and glamour of high-end photography equipment, but you don’t have to buy the latest and greatest gear to take great pictures. You do have to have a good understanding of the equipment and how to use it properly to get the most out of it. Photography is about more than taking a picture. It’s about creating an image, and that’s done by learning how to use all the different tools, not just your camera.

Use More Than One Flash

A lot of us have been in the standard makeup chair where we look in the mirror and feel compromised by how we look. Many times, we feel like we are stuck looking the same way we do at home with a few more pounds on our faces. Or, we look in the mirror and see ourselves looking thinner, and we think we look better, but we don’t. By now, most of you are familiar with flash photography, but you may not be familiar with more than one. This is a staple technique when shooting in low light. When shooting with your built-in flash, you may wonder if it’s possible to use more than one flash.

Photography Ideas & Concepts

Photography is an art, but it is also a craft. In this world of digital photography, the more you know about what you are doing, the better you will be able to take great photos, and the more enjoyable and rewarding your photography hobby will be.

For photography, there is an endless source of inspiration and ideas. But sometimes they are hard to find, and you need to know what to look for.

What are Photography Ideas & Concepts?

Each person is different and has a different point of view in photography. Some may like to take pictures of everyday things, landscapes, nature, architecture, and others may like to take pictures of their family, friends, pets, and other things. Photography is an art that can be used for many purposes, and each person can use it to express themselves.

Photography is a creative and artistic form of art that allows us to capture and express the emotions and feelings that we share with others. It is a complex subject with many ways to do it, and it is fascinating to learn about. There are different types of people in the world, but there is one common denominator among them—photography. They all want to express themselves through the art of photography. Here are some ideas that you can also try on.

Reflections

The reflections effect is one of the most commonly used techniques for artistic and creative photography, but it’s also one of the least understood. This blog will explore reflections and the reflection technique, provide examples, and explain how it works. We’ll also give you some tips on using and manipulating reflections for artistic and creative purposes.

Self Portrait

Self Portrait technique is a topic for photography. Initially, it’s a technique that was discovered by a photographer, Hans Wildenstein. First intended for use with his personal family photographs, he was surprised to find that it also worked well with other types of photographs. He was able to capture more of his personality in the photos he took of others.

Seek out Frames

One of the first (and most effective) techniques for getting a good picture is to frame your shot. But which way is best? It depends. If your goal is to capture a full, landscape-like view, then you should probably point your camera in the direction of the horizon. If you are trying to capture a portrait, then pointing it at the person’s head or face should be a no-brainer.

Make a Shallow Depth of Field

A “shallow depth of field” technique uses a tiny aperture to create a shallow depth of field, meaning that the focus point is in focus while the background is blurry. This technique is most often used when photographing a portrait of the human eye in order to make it look like the eye is in focus while everything else in the background is blurry. In other situations, however, a shallow depth of field can be used to emphasize a particular element in the composition.

Wide Angle

It’s easy to get caught up in all the technical aspects of photography. Still, sometimes the most stunning pictures are the ones that are captured spontaneously, without any elaborate set-ups. Wide-angle lenses are a great way to capture this vista, but many of us don’t know how to use them. In this post, we’ve gathered a list of wide angles and zoom lenses you can use to make your photos more dynamic and interesting.

Focus on Fine Detail through macro technique

The Macro is a photography technique used to take pictures of extremely close subjects to the camera, giving the resulting image a magnified effect. The Macro is best used when taking pictures of flowers or insects. A macro lens will be able to focus on items that are close to the camera, allowing the photographer to take pictures of flowers and insects that are up close and personal. The camera is able to automatically focus on the subject with such accuracy that it will be able to pick up on tiny details that would otherwise be overlooked.

The photographs that are taken leave an impression on our minds. They are often a glimpse of our own life and its emotions. They are our memories. So, what kind of photograph do you want to capture? If you want to capture a moment in your life or your beloved family, you can use the most traditional methods of photography. If you want to capture a moment in your life or your beloved family with good-quality photographs, you can use any form of modern technology.

Making Your Photography Sessions A Luxury

The fact is every time you step into a studio session, you’re entering a world of luxury. It’s one thing if it’s your own home, but a studio session is a different story. A lot of people may not realize that photography is a luxury service. For this reason, it’s essential to treat your sessions like you’re spending thousands of dollars on a hotel room. These are luxury appointments so why not make them feel like a true luxury?

What are photography sessions?

Photography sessions are a special time for photographers. It can be a little nerve-wracking. It can be a little awkward. But most importantly, it’s an experience that can only be done once in a lifetime. So, what makes these times so special? Well, first, it’s a great time to learn everything. You’ll get to see the many things being done by every photographer. What’s more, you’ll get to meet the people behind these photographs. And that’s an exceptional experience.

Photographers often want to shoot beautiful photos. They want them to look amazing because they love the art of photography. They want their photos to look like a showcase piece for their talent. They want their photos to capture the moment and look like the work of a professional. Of course, there are a lot of things to consider when looking for a photographer. One of the most important is time. How much time will the photographer need in the studio? How long will the photoshoot take? What if it rains? Which photographer will you choose? Here are some tips or ways to make your photography Luxury.

Capture an Interesting Lighting

Make your photography sessions more glamorous by learning to anticipate and capture the correct lighting situation to enhance your work. Get inspired by the time-lapse movies such as the one below of the Great Barrier Reef. This is a great time of year for capturing those beautiful winter scenes. If you’re like me, you want to capture those light-filled scenes with a little tripod shake. The best way to capture exciting lighting is to find a way to move around.

Chose a Clear Subject

One of the most important aspects of making photographs is to make it clear what the photo and story you are trying to tell. The title of the site is called “Chose a Clear Subject,” and part of that is to make it clear what the subject of the post is, what the theme is. Finding a topic that’s relevant to you and the people reading your blog is a big part of creating a successful blog. To find a subject that holds interest and relevance for potential readers, try picking a subject that you enjoy reading about or one that’s related to your own experiences.

Do Digital Styling

Digital photography is our future, and we live in it. We will all be shooting with a digital SLR camera well before the year is out, and we will all be editing our images on an iPad Pro. This means that our photography style will change, and we should do the same. Learn to style your photography session, even if it’s just using 5 minutes of your session. Style gives an image a mood, and an image that doesn’t have a style, won’t be taken very seriously.

Creative Composition

Taking photos is a wonderful hobby, but sometimes it can be difficult to take the perfect shot even when you know what it should look like. Who can you turn to for help? You can hire a photographer who can have a designer studio to create a picture composition as well as a theme. For instance, if you need a photoshoot with an office theme, a photo studio might already have all the necessary furniture and tools (these can help for further resources) that can be used to design the office environment. Or, you can try plucking the perfect shot yourself by following one of the countless tutorial guides and tips online. But even those aren’t always enough. After all, you can’t just walk up to your neighbor and show them the perfect photo you took on your cell phone.

The idea behind a photography session is that it’s more than just the shoot and the product, it’s the overall experience. From getting dressed up for the occasion, to your outfit choice, to the location and even the lighting, it all helps to bring out the best in your photography. Our goal is to provide you with the tools you need to create the experience you want during your sessions.


DSLR Camera Tutorial

Aspiring photographers can buy a point-and-shoot camera that shoots decent photos, but they also have the option of investing in a DSLR, which is a digital single lens reflex camera that offers more control. This Digital Single Lens Reflex (DSLR) Camera is a popular choice among professional photographers since the quality of photos it produces can be comparable to a DSLR. However, the good news for beginners is that there are DSLR Cameras for a much cheaper price than a large DSLR Camera.

What is DSLR?

DSLR stands for Digital Single Lens Reflex, which is simply a camera that is capable of taking better photos than a traditional single-lens reflex camera (SLR). This means the photos are sharper, and the colors are more vivid. Digital single-lens reflex (DSLR) cameras are the photographers’ dream. A DSLR offers the convenience of a compact camera with the quality of a high-end digital SLR camera.

Why do we love DSLRs? They are the perfect all-purpose camera for just about everything: family gatherings, vacations, school projects, and special events. DSLR cameras are also a great option for anyone who wants to take better pictures than the average point-and-shoot camera or smartphone.

How to use the DSLR?

Does your DSLR camera need a new battery? Are you running low on memory cards? Does it need a new lens? If you answered yes to any of these questions, you’ve come to the right place. We will show you how to use your DSLR to its full potential.

The Auto mode

DSLR cameras have changed since I first started shooting photos nearly a decade ago. While I couldn’t have imagined back then that we would have such a wide choice of interchangeable lenses or that DSLR cameras would become so popular, I’d be surprised if today’s photographers didn’t feel fully equipped. The digital age has brought us some amazing technology, including a host of available accessories that allow you to customize the way you shoot.

“Auto mode” is the term used when a DSLR camera is set to automatically select the shutter speed, aperture, ISO, and other settings based on the exposure you want. It’s useful for scenes where you are not sure of the settings you need to use, but you know the scene is going to be a struggle to get the exposure you want.

The Autofocus System

Do you have a DSLR camera? I know that you want to do some serious photo shooting. You also know that you want your camera to be able to perform well in low-light situations. You do not want to miss the action because your camera is not able to focus on the subject, right? That is why you need to have an autofocus system in your DSLR camera. Since the introduction of Video Autofocus, the system has proved very popular with people looking to make movies with their DSLR cameras. Today we will be looking at the Nikon D800E and the T3i. This system is a combination of focusing the image with the camera and then allowing you to manually focus it with live-view or a magnified image on a screen.

The Aperture priority mode

The Aperture mode is a special mode of operation. In this mode, the sensor is exposed to light through a set of different-sized holes. The size of these holes is based on the ISO setting, which affects the amount of light that comes through the hole. This is known as the lens opening or aperture and is the reason why the image sensor moves when you change the ISO setting.

The Shutter

It’s easy to get frustrated when taking a class and don’t get the pictures you want. But ‘shutter priority isn’t always the answer… because you can’t take a picture while you’re taking it. That’s where ‘shutter priority mod’ comes in. We’ll show you how to turn your DSLR into a ‘shutter priority mod’ and get some great photos in the process.

The ISO

ISO is the international standard for measuring the sensitivity of film and image sensors to light. The ISO rating tells us how sensitive the sensor is to light, so for example, if the ISO is 100, the image sensor will only be able to record high-quality images when there is no light present. There are many ISO ratings available, with the lower-numbered ones being the most sensitive, while the higher numbers are the least sensitive. ISO 200 is a good starting point, but as your skill with your camera increases, you may want to increase your ISO rating to 3200 or even 6400.


Best Accessories & Photography Tools

What is a photographer without the right tools? Whether you’re a professional photographer or just a hobbyist, you can’t go wrong with a good camera. With all the digital cameras on the market, there’s a lot of choice to make and even more resources to find more information. For beginners, though, it is important to find the best camera for their needs. That’s where we come in.

Replacement Camera Straps

There are many reasons why a camera strap is an essential accessory for any photographer. Some may only want to carry the camera around for a few hours a day, while others may rely on it for hours on end. Whatever your shooting style, you need a camera strap that is made to last.

Memory-Card Wallets

Memory card wallets are a fairly new invention, taking the form of small pouches designed to be carried in a camera bag that holds your memory cards securely while keeping them easy to access for quick changes. There are two basic types of wallets: one-size-fits-all and individual-sized. While the former is ideal for photographers using big setups, the latter tends to be more useful for those who often switch memory cards during a shoot, as they provide increased security.

White-Balancing Tools

White balance and exposure are two of the key elements of photography that can greatly improve the visual quality of your photos. However, neither of these are elements that you can fully control. This is why we have White Balance and exposure control tools. When you buy a camera, you need to understand that there are multiple options for you to choose from. Knowing the right one will help you get the best out of your photography and ultimately help you improve your photography skills.

Cleaning Kits

Camera cleaning kits are very important when you take pictures, because if you take care of your camera, you will get good quality pictures. There are many types of camera cleaning kits so that this article will describe the most important ones for you.

Camera Bag

Camera bags are a big deal these days. Everywhere you go, there’s that one guy who carries a bag with a camera in it everywhere he goes. Why? Because he knows that a camera bag is a versatile, useful, and easy way to carry and protect your camera. It’s perfect for those who don’t have a car and don’t want to rely on public transportation or those who like to spend time in the outdoors. You can also use a camera bag to transport your camera when you’re on the go and want to take a large variety of photographs.

Tripod

Tripods are one of the most common photography accessories you see, but how much do you know about them? What kind of tripod is best for you? What should you look for when buying? Let’s take a look at the top choices on the market today and figure out why they’re so popular.

Portable Green Screens

Most photographers, vloggers, and videographers make use of green screens. It is used in studio shoots, film productions, and even during weather reports for editing images and videos. If you are looking for a portable green screen, check https://serp.co/best/portable-green-screens/, or similar resources to compare the prices and features.

Filters

All camera manufacturers have their own versions of camera filters, which are designed to enhance the look of your photo. There are three basic types of filters: UV filters, warming filters, and polarization filters. Aside from these types of filters, there are many others, but the most important one seems to be the Variable Natural Density filter. It allows photographers to control exposure, which is necessary for amazing results (more about this filter can be learnt by going through the post at shutterreleaseworld.com).

Collapsible Reflector

The collapsible reflector can be used in a variety of situations. From the simplest to the most complex, it will not let you down. It easily collapses to a smartphone or compact camera size and can be easily carried with you as you go about your day. It is a versatile, practical, and functional piece of lightweight and simple equipment to use. It can bounce light from a flash or speed light source or reflect ambient light from a subject.

External Hard/Solid State Drive

Despite its reputation for being very hard to come by, an external hard drive is a very helpful thing to carry with you if you own a camera, computer, or tablet that cannot store data, or if you need to transfer large files from one device to another. Essentially, an external hard drive is a storage device that connects to a computer or other digital device via a USB or FireWire connection. They have many benefits over simply using a memory card, such as not having to worry about running out of room on a smartphone or tablet or being able to transfer photos from the camera to a computer without transferring the entire card.

Memory Card Reader

Memory card readers have been around for several years now, but the new, shiny ones are hot property among consumers and pros alike. There are plenty of options to go around, and you can expect to run into some that may have some compatibility issues occasionally.

Photoshop or Lightroom?

Photoshop and Lightroom are two of the most important tools for the modern photographer. They work together to allow you to create and edit your images. Both have their advantages and disadvantages, which may impact your decision of which program to use. There are many ways to do photography and some are quick, and some are slow. Some are simple, and some are complex. Some are hard, and some are easy. Some are good, and some are bad. Some are expensive, and some are cheap. Some are perfect, and some are not.

What is Photoshop

Photoshop is a photo editing software for Windows, Mac, and Linux used to edit photos. It is used to make photos more appealing by adding artistic effects like altering the color, adding animations, and adjusting the brightness. Photoshop is semi-additive, and if you use it for even a few days, you will feel compelled to edit all your photos.

Photoshop has become the standard image editing application on the Mac, while Lightroom is the go-to for many photographers. But what is Photoshop, and how is it different from Lightroom? Photoshop is the industry standard for image editing, delivering professional results for digital photographers, photographers, designers, and anyone else who needs to retouch and enhance images.

What is Lightroom

Lightroom is a free photo editing and management app for Mac and PC. It provides an easy way to manage, edit and share your photos, and is perfect for anyone who wants to create a visual catalogue of their work. In the following article, we will discuss its most popular features. Lightroom is a powerful photography editing and organizing tool. Available for Windows and Mac OS X, the software is free and offers users the best experience for organizing, editing, and sharing their photos on the web and printing. Lightroom is also on its way to becoming a full-fledged photo editing and sharing tools, like Photoshop and Photoshop Elements.

Photoshop is the top choice for anyone who wants to edit or retouch their images. It is considered to be the best image editing software. Photoshop has the ability to add more effects and features to any photo. Photoshop is the top choice for anyone who wants to edit or retouch their images. It is considered to be the best image editing software. Photoshop has the ability to add more effects and features to any photo.

Adobe Photoshop, the flagship product of the Adobe Creative Cloud, is arguably the most important piece of software in the world of digital photography. It is used by professional photographers and artists alike, and it is ubiquitous, ensuring that every image you see on the Internet was probably created using the software. Lightroom is another piece of software that has made a big mark on the photography industry, and it is used for editing photographs on the computer.

Photoshop or Lightroom can improve your photography skills and help you create amazing photographs in no time. They are different tools that can take your photography to the next level.

It is sometimes hard to remember how important Photoshop is. Still, once you understand the power of Photoshop, it becomes easier to understand why it is such an important tool for photographers. Photoshop is the most popular image editing tool on the planet, and it is used by millions of people every day.

Lightroom is good, but Photoshop is better when it comes to editing. Photoshop is one that has been around for a longer period of time. It is a very powerful tool that can do many things. It is so powerful that it can make a good picture better or make a bad picture good. For many, Photoshop is a necessary evil. It opens up the world of digital photography while also allowing us to make our art better with the right tools. If you’re like me, and you’re not a Photoshop guru, then you’re probably wondering and what are the pros and cons of using Photoshop to edit your photos?

Photoshop is an extremely versatile application, which enables you to edit images in a variety of ways. Sure, you can save a Photoshop document as a JPG or PNG file and then import it into an image editor like Lightroom for basic editing. Still, Photoshop has many additional features beyond just editing images. Changing your resolution in your photo editor is a quick fix, but it won’t take care of all your problems. If you need to make adjustments to your photos, you’ll need Photoshop. If you need to make larger prints, you’ll need Lightroom. If you need to make minor edits, you’ll need both.